
Going with the flow
Crochet diagrams come in different forms. Some start from a magic ring, with the rounds spreading outward; others are worked in rows, going from right to left and then left to right.
It's easy to see that when a diagram is worked in rounds, the stitches sit on a series of concentric circles, and when it's worked in rows, they sit on straight lines. But what if a diagram has both? Or neither? Take a granny square: it starts with a ring of chain stitches, but as it grows outward, it becomes more and more of a square.
All or nothing
Freeform crochet charting tools handle this in almost the same way: it's an either/or option. A constraint applies to the entire diagram or not at all; there's no middle ground. Turn the guides on, and rays shoot out from the center toward infinity, with concentric circles lined up around them. Some programs even let you switch the current diagram's guide from a radial one to a square one, which can break the layout of the whole diagram, and sometimes that change can't be undone.
Mix and match
StitchPress takes a rather different approach: it doesn't enforce a diagram-wide guide, so there's no either/or choice to make. Instead, it gives you different guides to choose from and lets you combine them however you like. You can still build a diagram that grows outward on a concentric circles guide, the traditional way, but you can also combine a circle guide with line guides to make a granny square guide, with the stitches lined up along it.
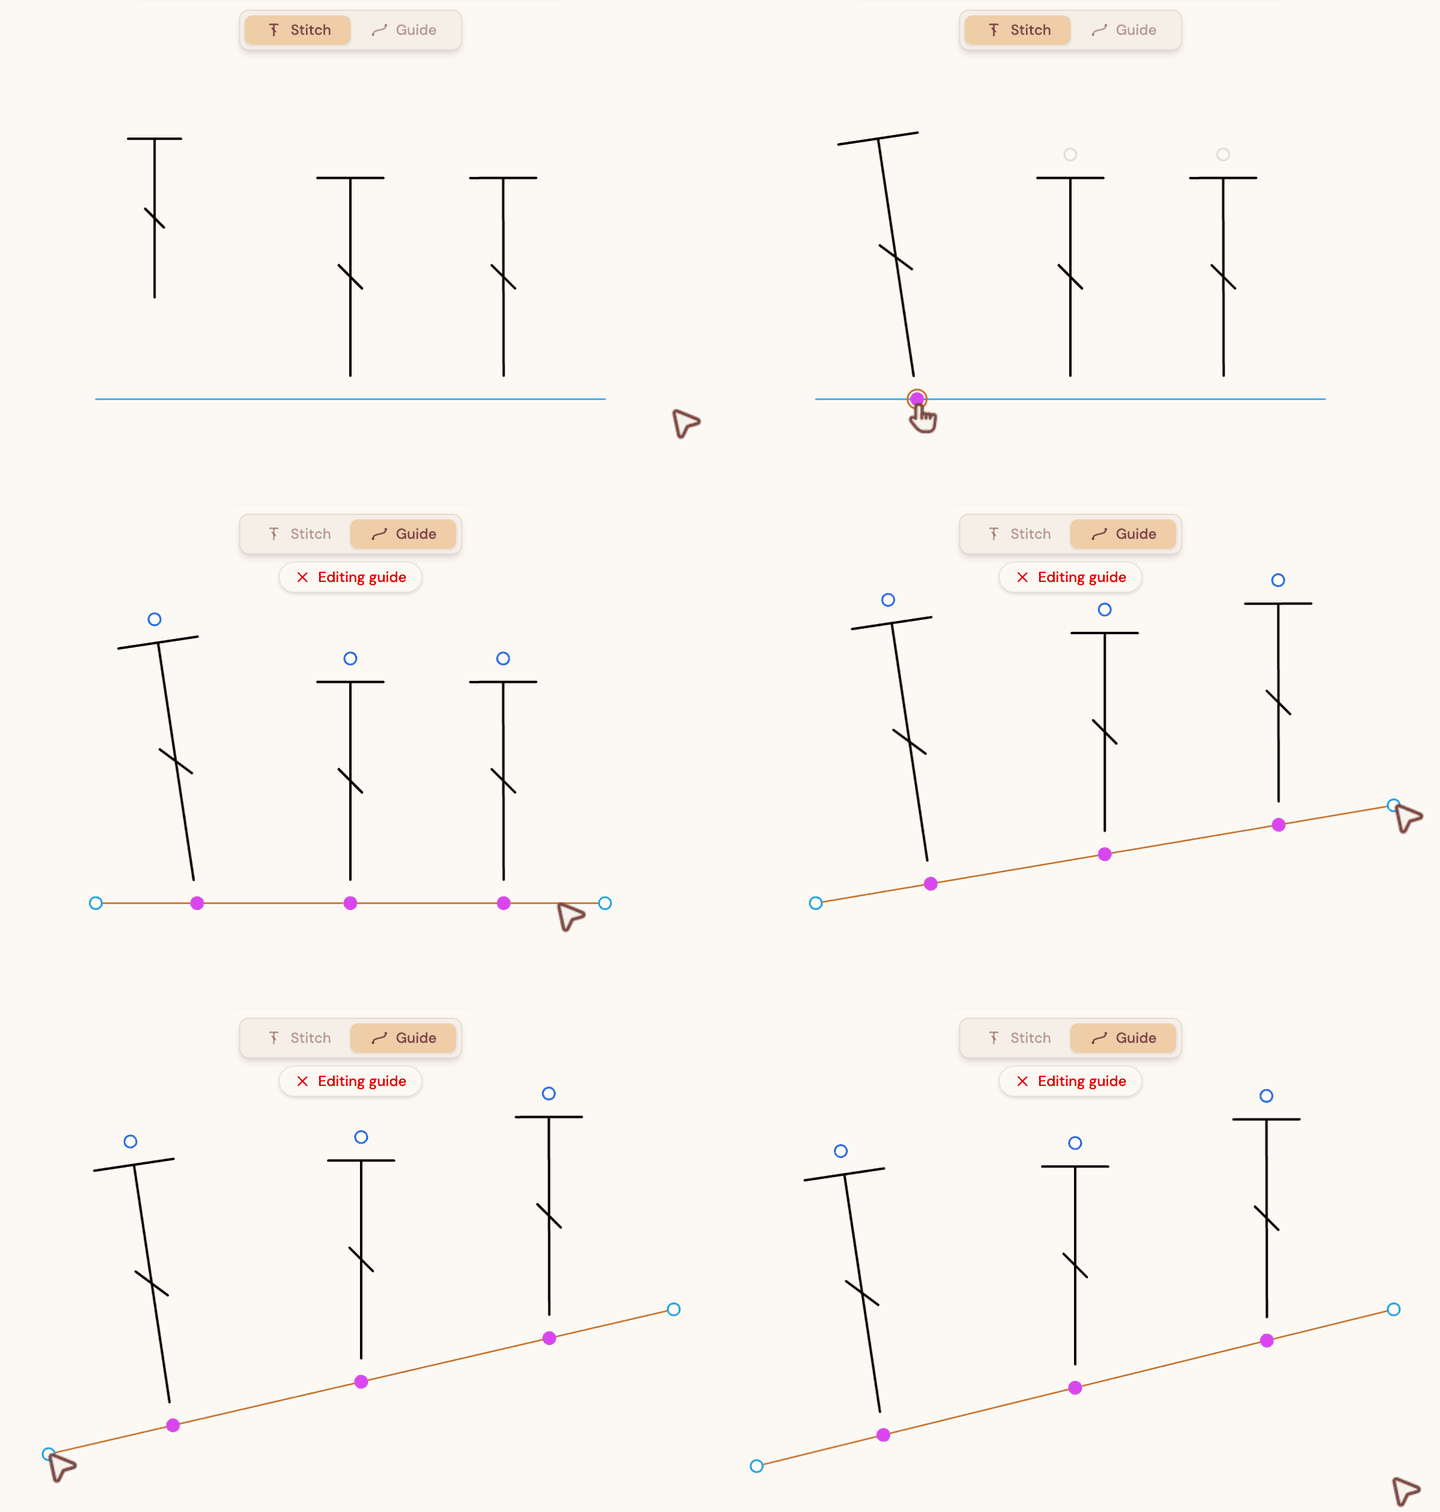
To constrain a stitch to a guide, just drag one of its handles onto the guide until it snaps. From then on, the stitch moves with the guide and keeps the same relative position along it.
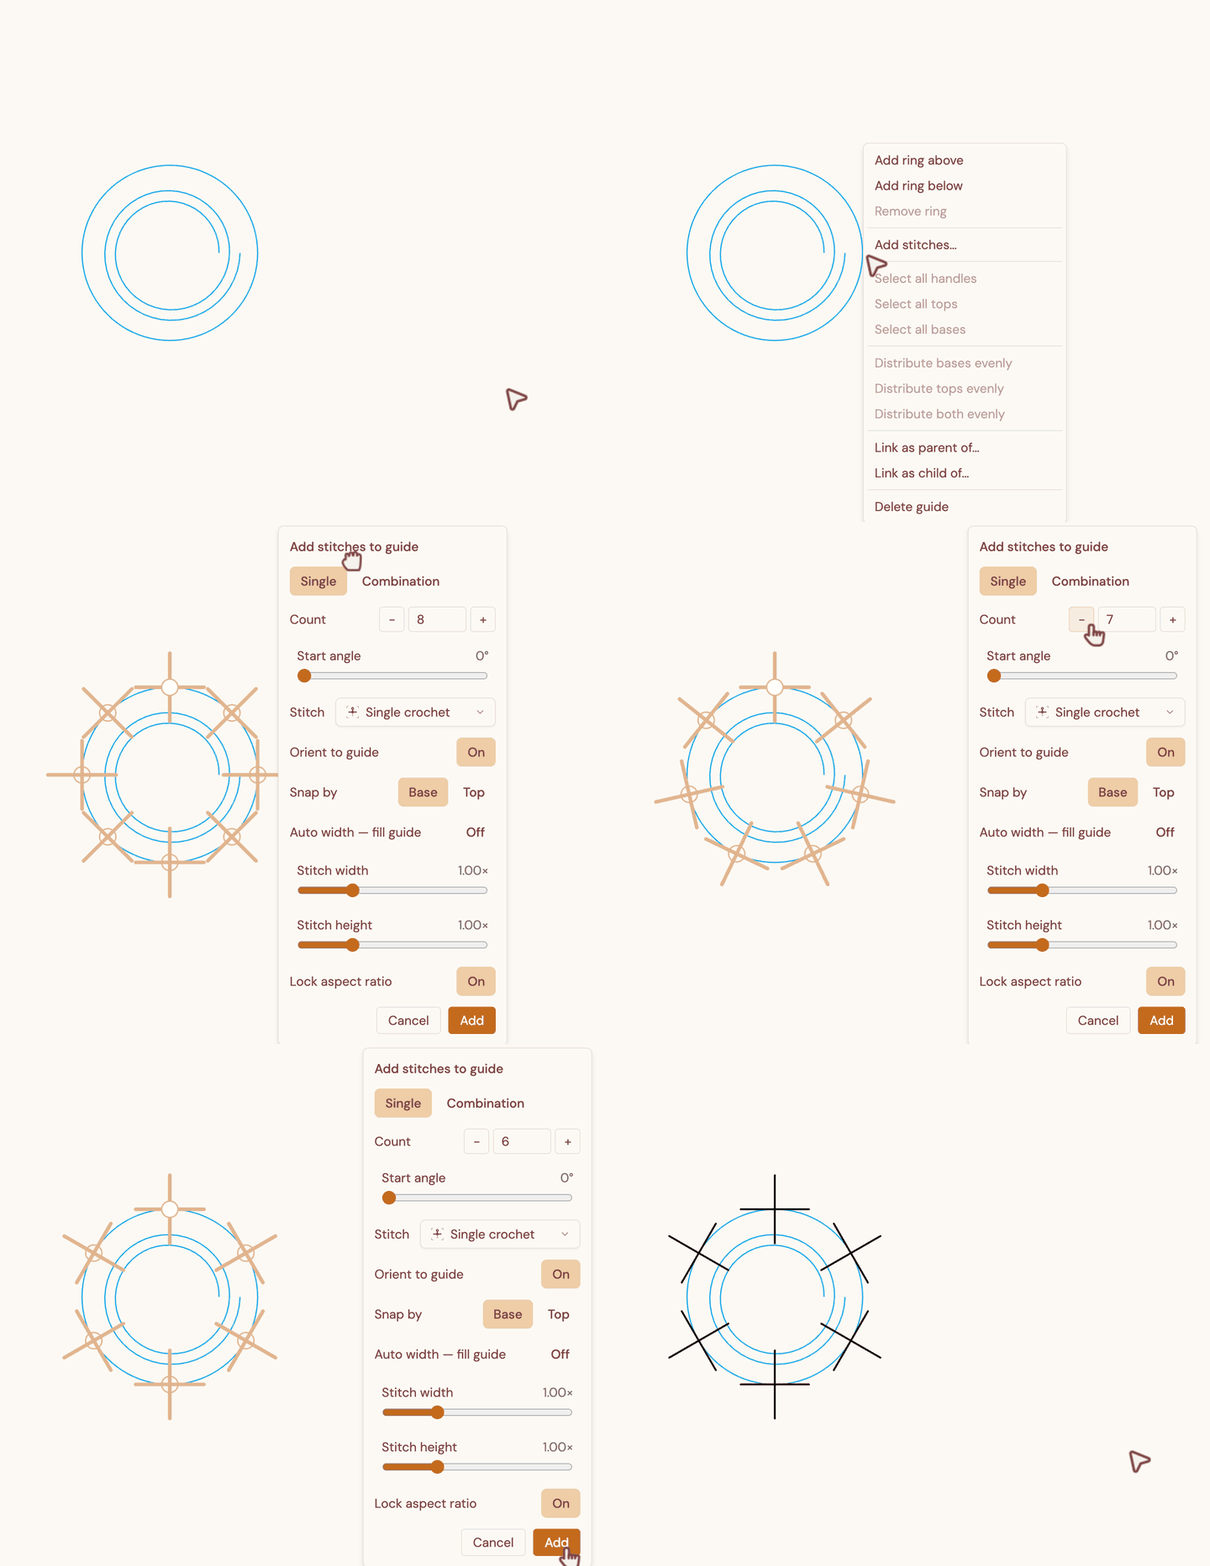
Guides are also handy when you need to add new stitches that follow a certain shape and are evenly spaced.
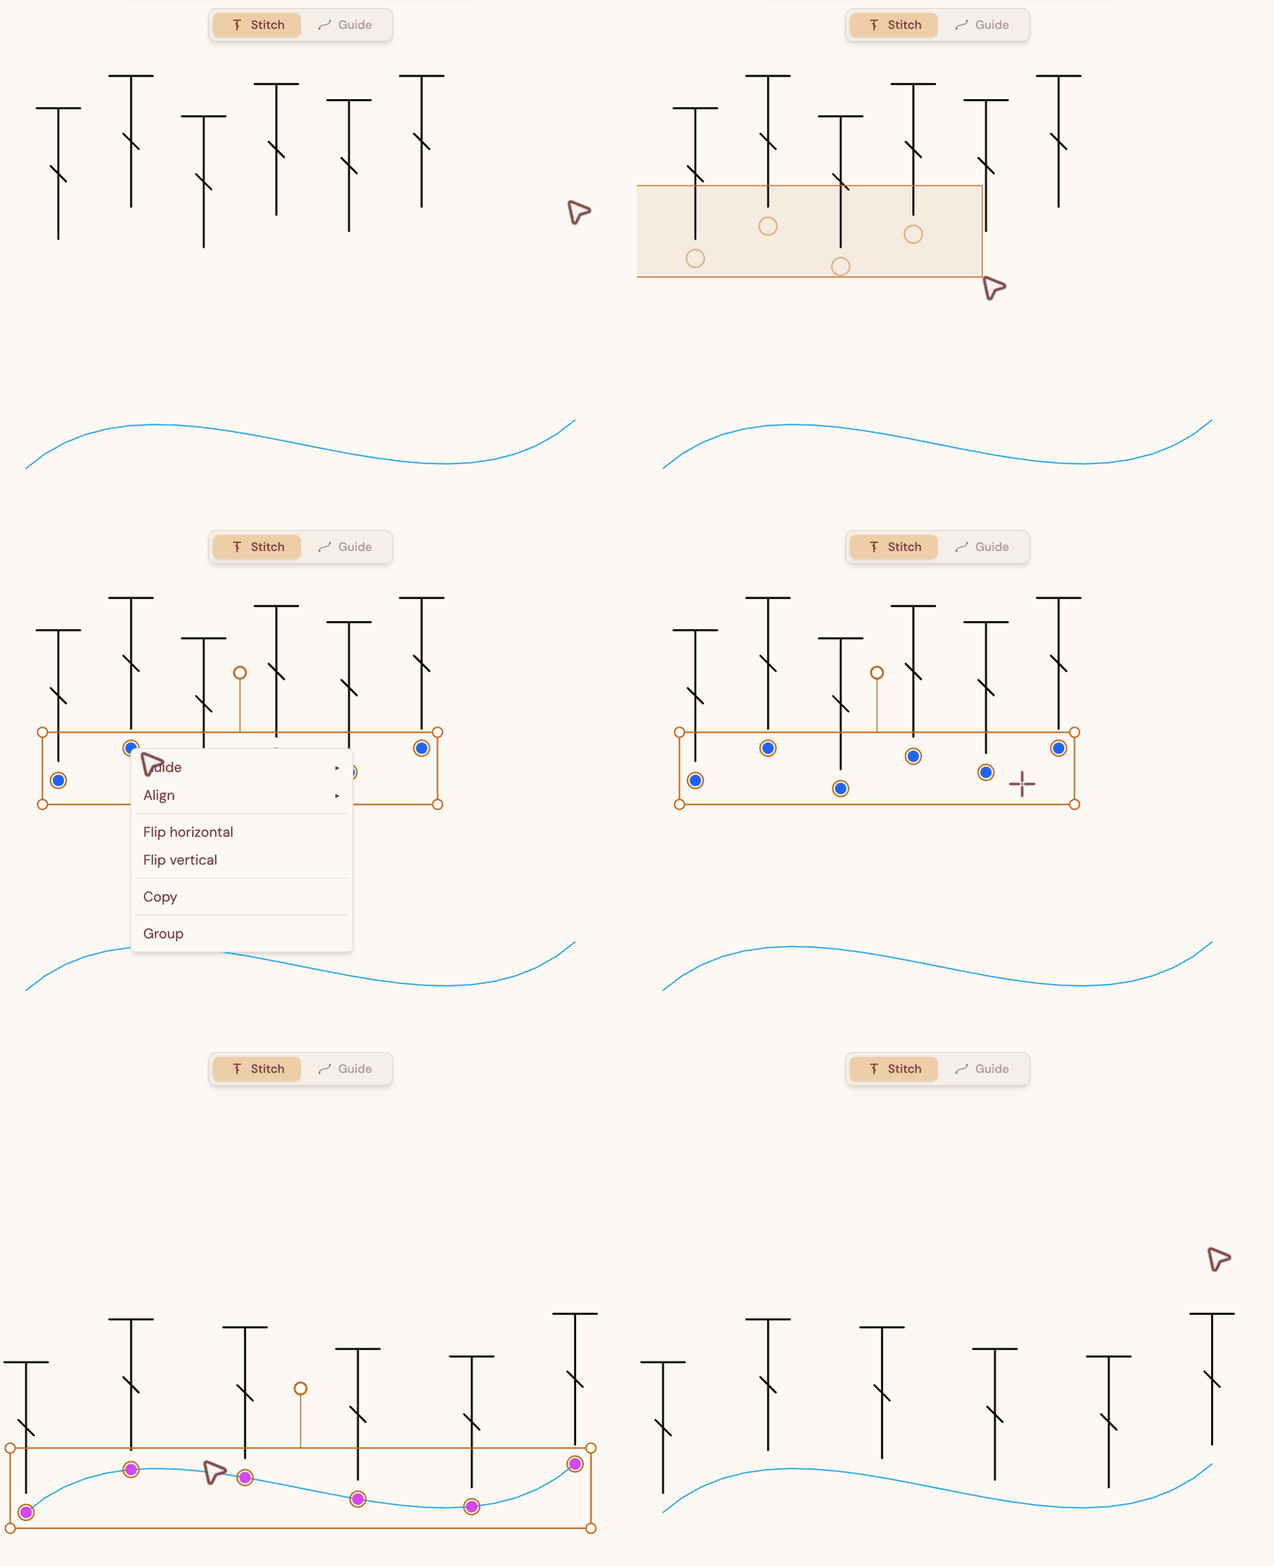
And when you want to spread stitches you already have along a certain path, a guide can do that too.
Four kinds of guides
StitchPress currently supports four kinds of guides: the line, concentric circles, concentric arcs, and the Bézier curve.
The line
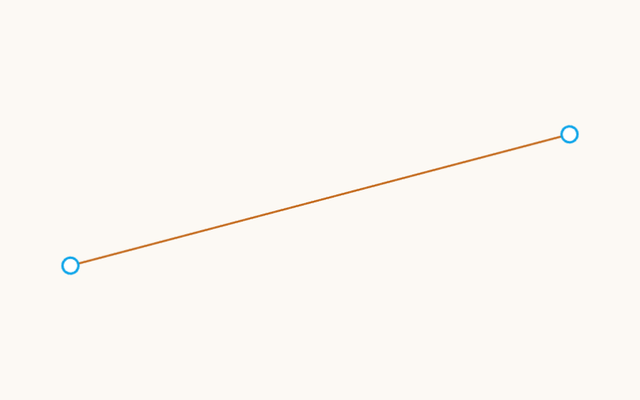
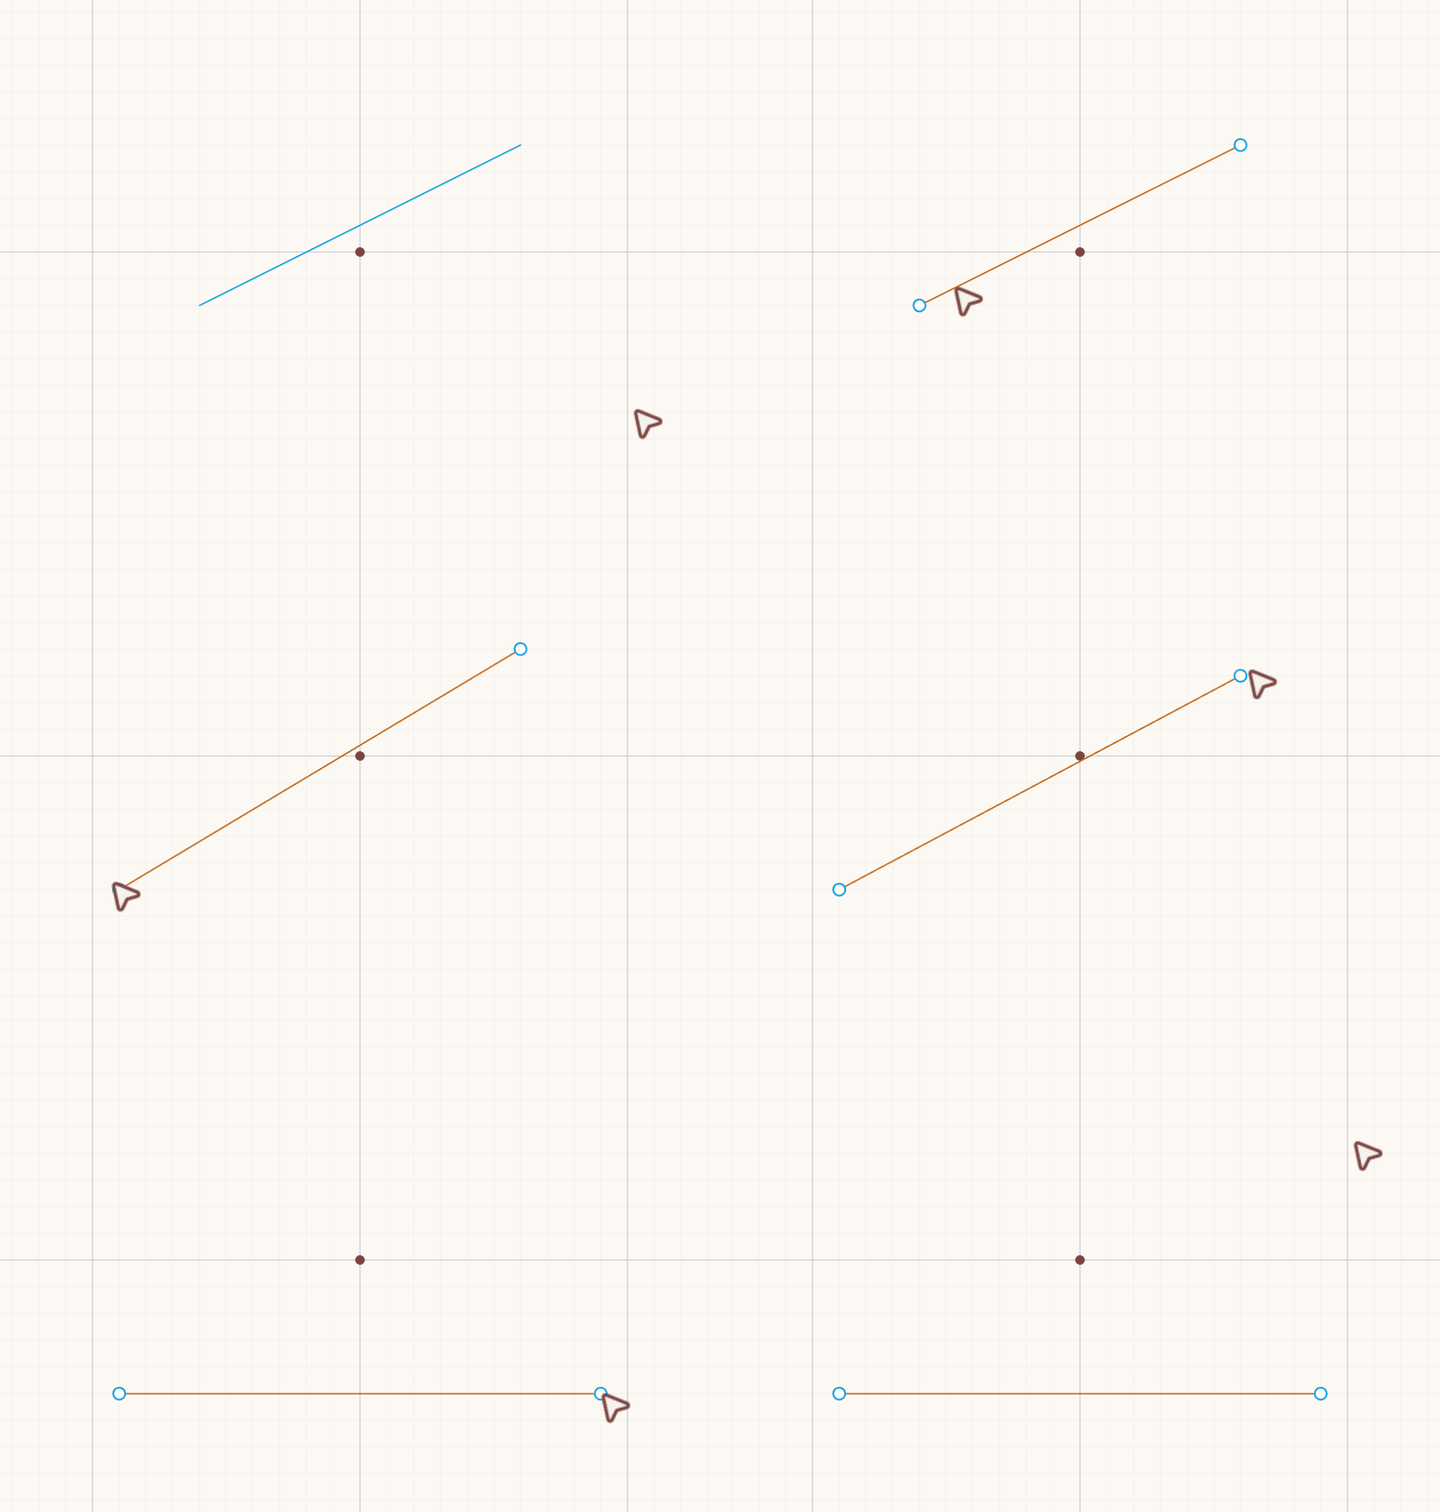
The line is the simplest guide in StitchPress. Drag its endpoints to set its length and angle, or drag the line itself to move it somewhere else. You can also turn on the background grid (lines or dots) to help position it, and snap its endpoints to the grid.
Concentric circles
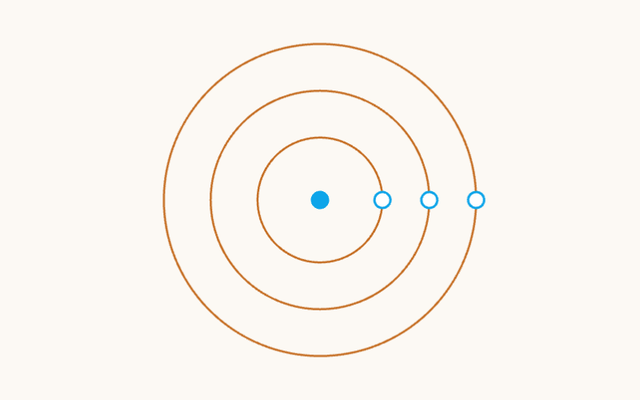
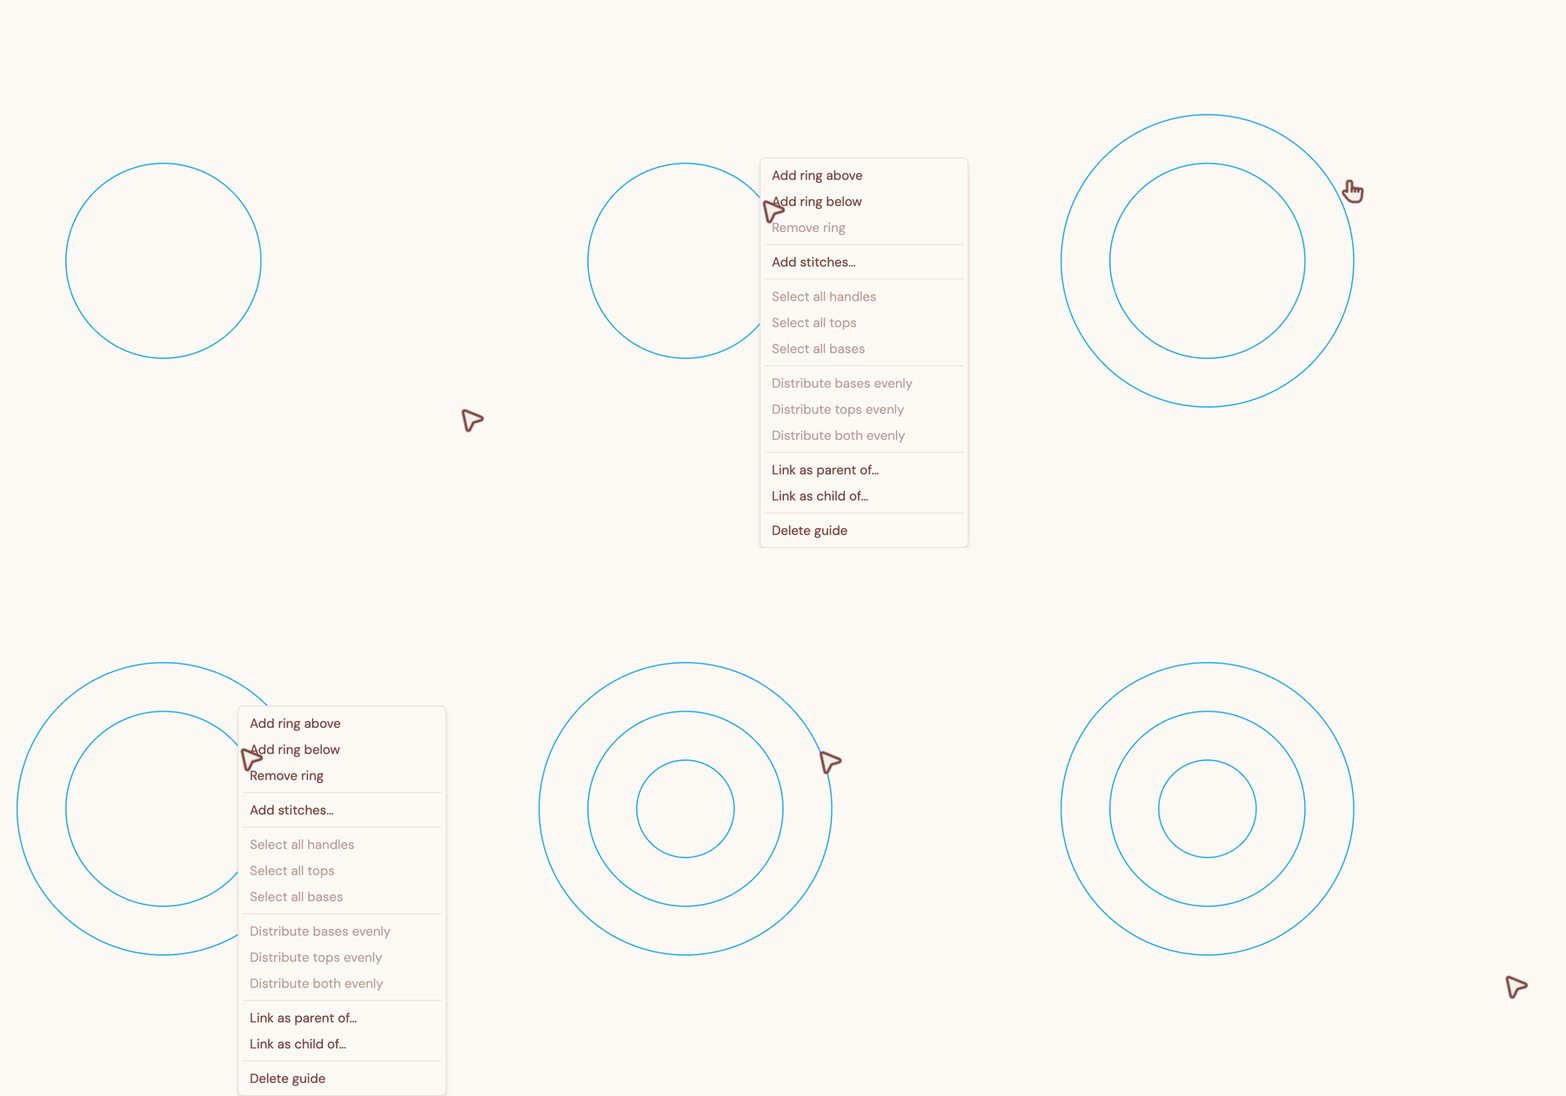
The concentric circles guide is the one to reach for when your diagram starts from a magic ring (there's even a magic ring version that draws the ring symbol in the middle). Right-click a ring to add a new ring above or below it and grow the diagram.
Concentric arcs
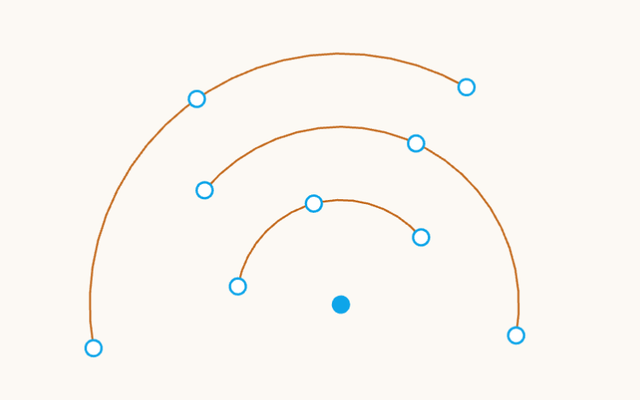
The concentric arcs guide works much like the concentric circles guide when it comes to editing and adding or removing rings. The only difference is that an arc isn't a closed loop: it has a start angle and an end angle, and each ring can have its own pair.

The Bézier curve
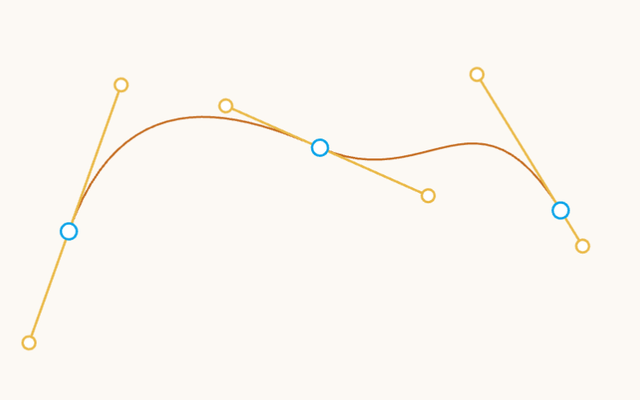
The Bézier curve guide is the most flexible guide in StitchPress. It can be an open curve or a closed loop.
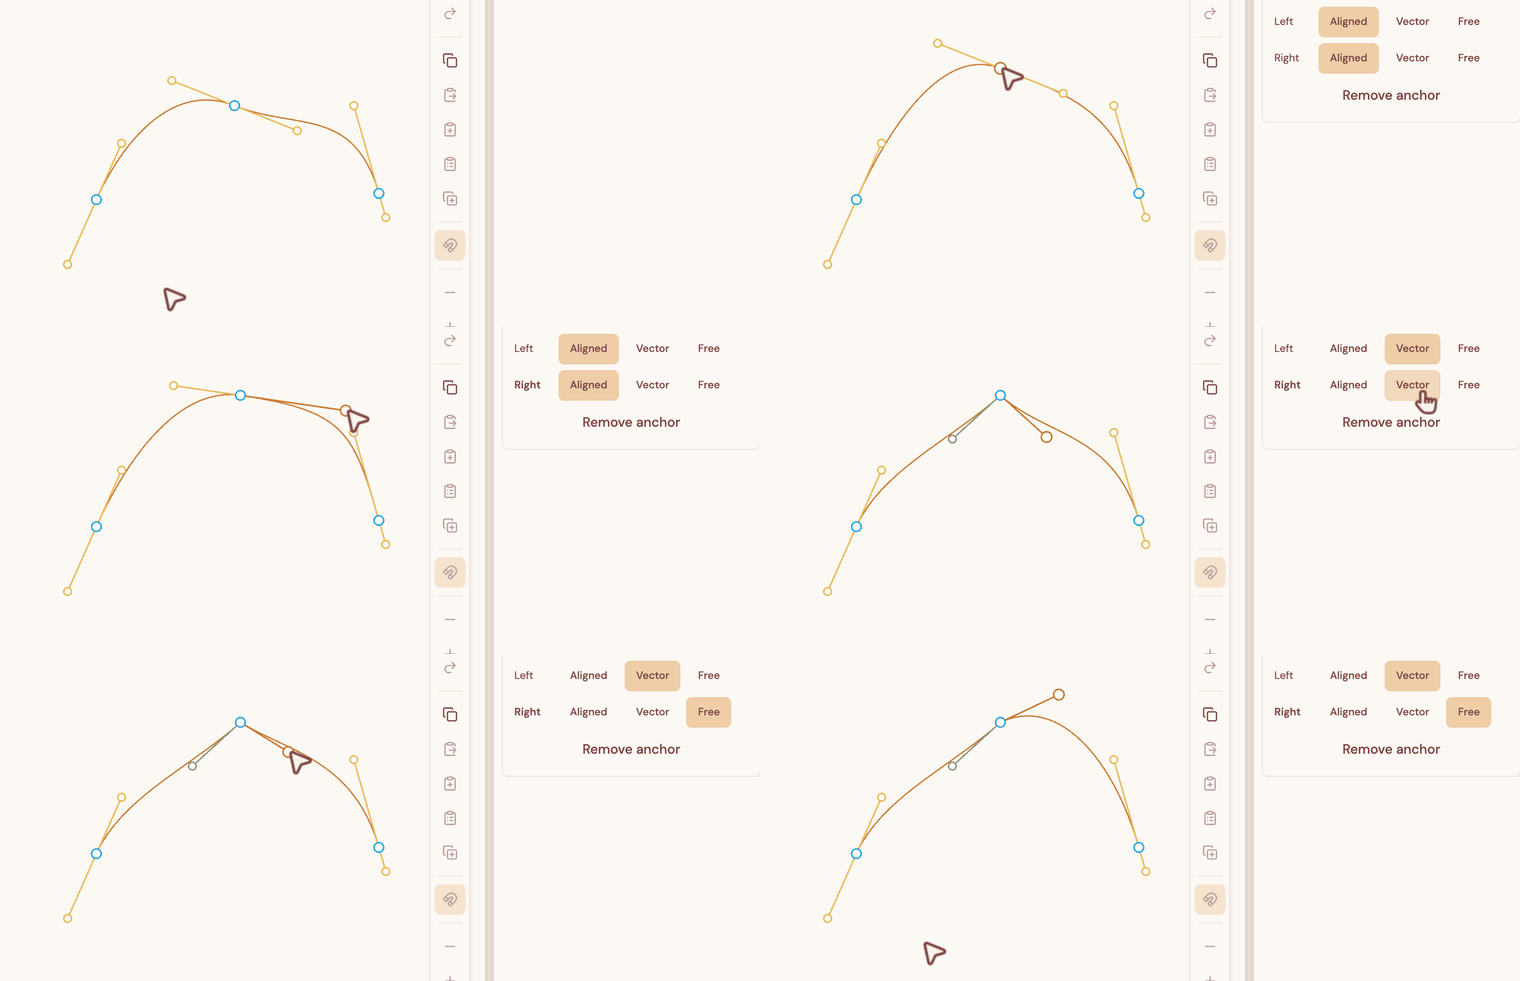
Editing a Bézier curve in StitchPress is heavily inspired by Blender (the 3D modeling software). Every segment of the curve is a cubic Bézier curve, and each anchor has a left and a right control handle. A segment is controlled by an anchor, that anchor's right handle, the next anchor, and the next anchor's left handle. (These are the four control points of a cubic Bézier curve.) You can move any of them by dragging, and each handle can be one of three types:
- Vector: points straight at the previous or next anchor.
- Aligned: stays on one straight line with the anchor and its other handle.
- Free: no constraints at all.
We'll leave the details of the Bézier curve guide, and the how-tos, to a separate article or the documentation site.
Those are the guides StitchPress has today, and you can combine them into more complex shapes. For example, two lines and two arcs make a capsule shape. And with the Bézier curve, organic shapes are much easier to draw.
In the next article, we'll look at how you can take the diagrams you make in StitchPress wherever you need them, and how we respect your intellectual property: how we store your diagrams and how they're used within StitchPress.
See you in the next one!
StitchPress is currently in pre-alpha, and we're actively looking for crochet diagram designers to help shape the experience. If you're interested and we haven't reached out to you yet, email us at contact@kinnet.studio. If you'd like to follow along with the alpha and beta tests, join the waitlist: